How to Use the AI Article Autopilot
Written By Tom van den Heuvel
Last updated 5 months ago
What does the AI Article Autopilot do?
The AI Article Autopilot automatically turns high-opportunity topics into fully optimized blog articles for your Shopify store. It researches topics, generates structured content, adds relevant product mentions, and prepares everything for scheduled publishing.
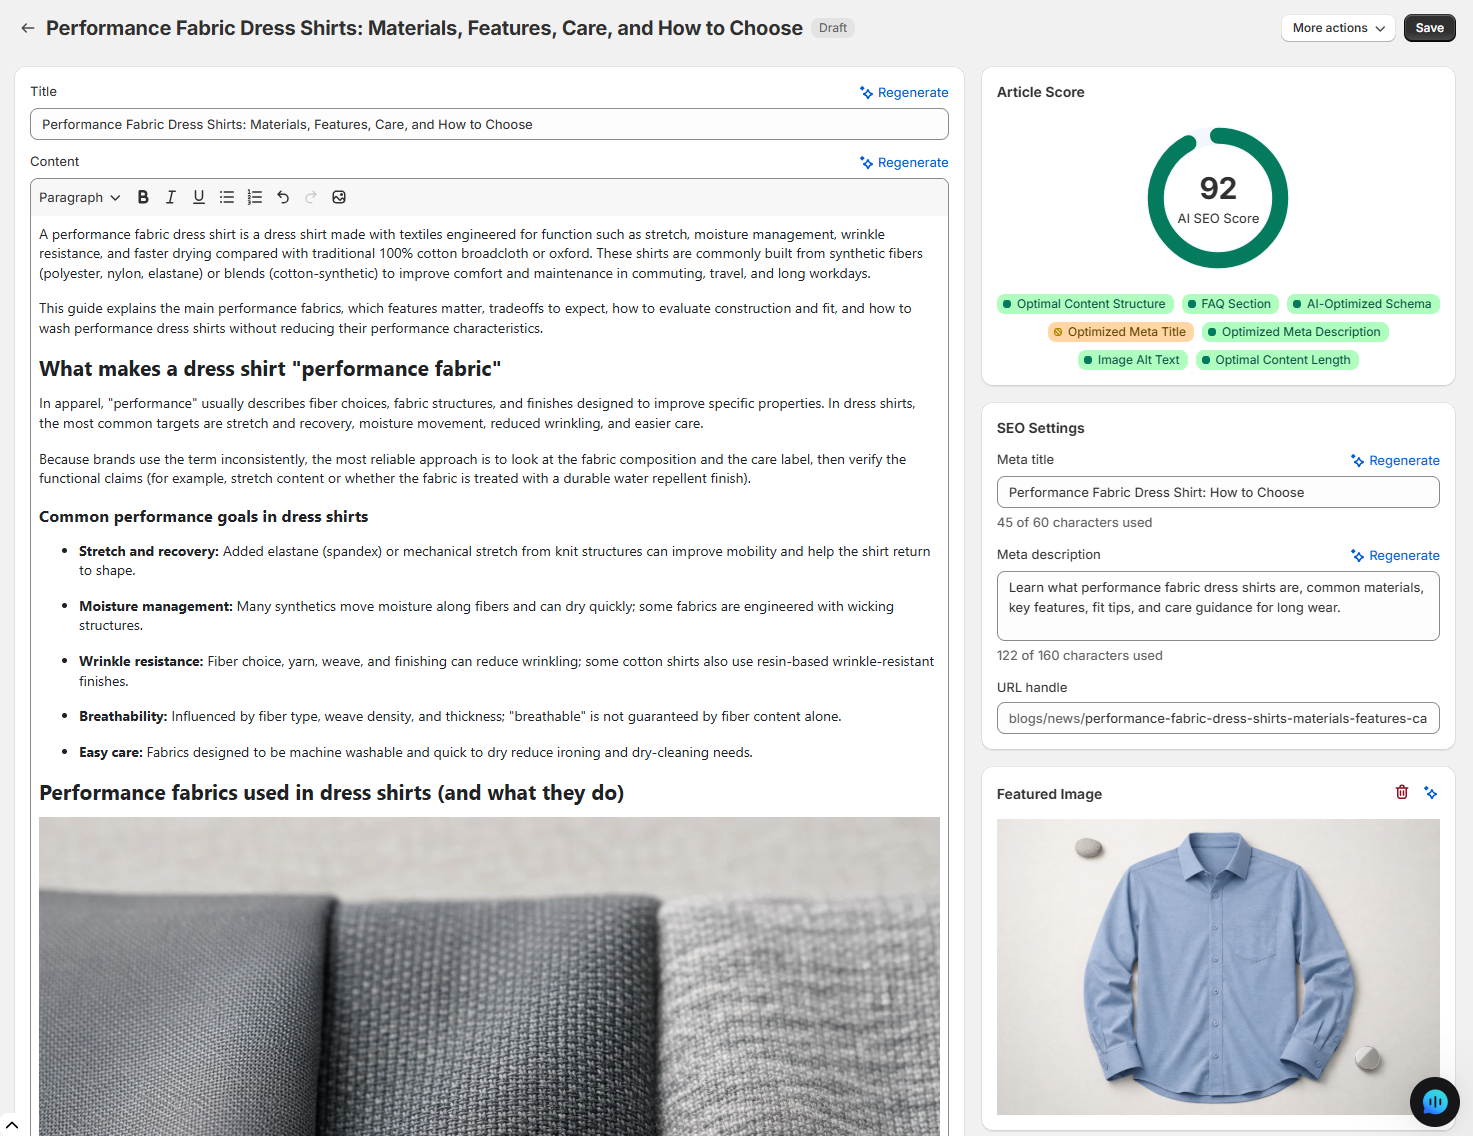
Each article is optimized for both traditional SEO and AI discovery. That means proper headings, internal linking, FAQ sections, and structured schema markup that helps search engines and AI systems understand and surface your content.
You choose how much control you want. Review drafts before publishing, enable auto-publish, or let the calendar auto-fill based on the best opportunities.
The result: consistent, high-quality content that drives organic traffic without manual writing or content planning.
Step 1: Go to the AI Article Autopilot
You can access the AI Article Autopilot at Apps → StoreRank.ai → AI Article Autopilot.
You’ll see:
AI Suggested Topics
Topic filters (New, Recommended, Queued, Scheduled, Published)
Sorting options (Opportunity, Difficulty, Volume, etc.)
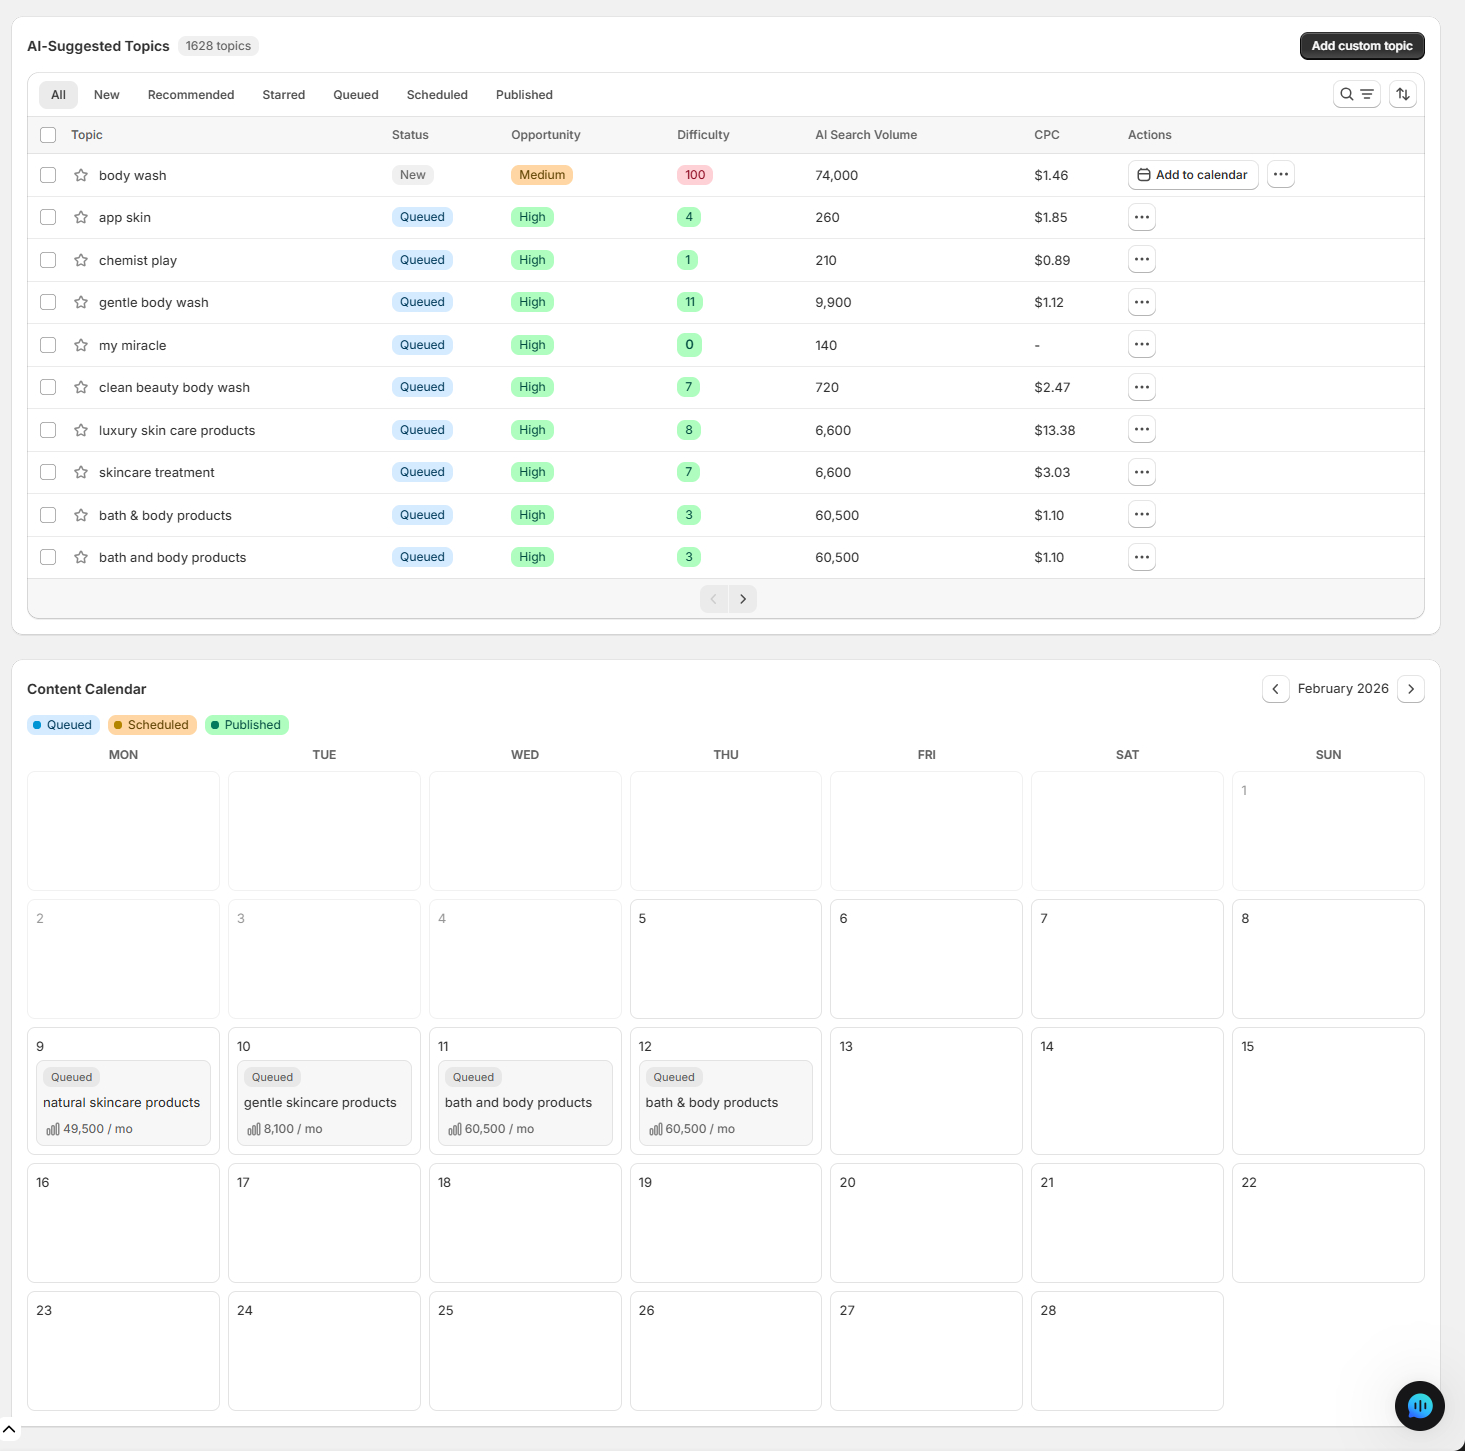
Content Calendar
Content Settings
Step 2: Review your AI-suggested topics
AI Suggested Topics
We have already pre-generated topics based on your store and niche. We recommend that you check review these and edit/remove where you see fit.
You can:
Filter by status
Sort by Opportunity, Difficulty, Volume, CPC
Star topics
Add topics to calendar
Edit topics
Remove topics
Add Custom Topics (Optional)
Click “Add custom topic”.
Important:
You have a limited number of research runs per month (depends on your plan).
Add 20–50 keywords in one batch to maximize each research run.
We analyze volume and difficulty for all keywords in one go.
Step 3: Add Topics to Your Calendar (Or Enable Auto-Fill)
If Auto-fill Calendar is enabled, you don’t have to do anything, and topics will be automatically be added to your content calendar, prioritized on Opportunity.
You can also manually click “Add to calendar” on a topic.
Your plan determines how many articles can be added per month:
Starter: 1/month (no auto-fill calendar)
Pro: 4/month (auto-fill available)
Growth: 8/month
Scale: 16/month
Step 4: Edit a Topic (Optional)
Click the three dots → Edit.
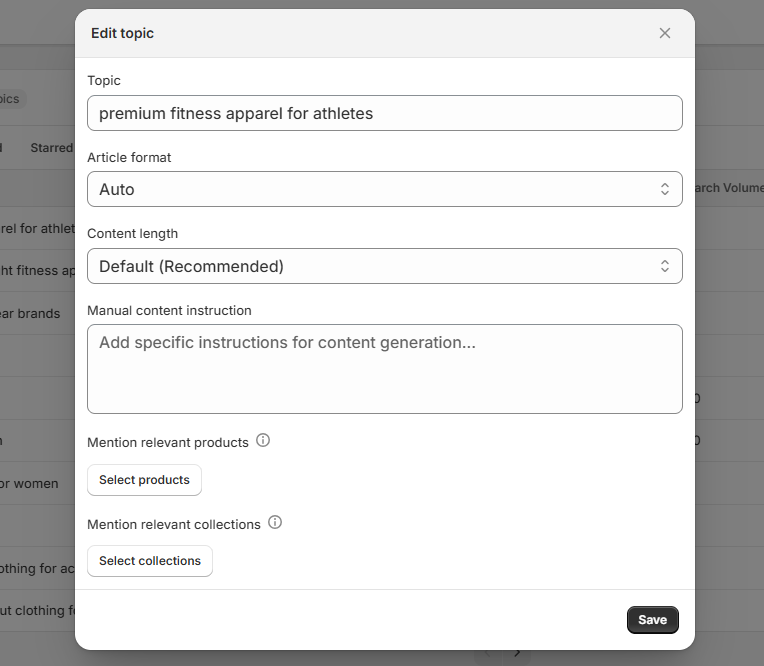
You can:
Change the topic title
Adjust article format
Set content length
Add specific manual instructions
Mention products
Mention collections
You can even select relevant products and collections to be mentioned in the article.
Use manual instructions for:
Specific angles
Target audience
Internal linking notes
Brand messaging constraints
Save when done.
Step 5: Understand statuses
In the Content Calendar:
Queued = Scheduled, not generated yet
Generated = Article created and ready to review
Published = Live on your blog
Articles start generating 5–7 days before the publish date.
This gives you time to:
Review
Edit
Adjust SEO
Regenerate sections if needed
Step 6: Review and edit generated content (optional)
After an article is generated, you can view the article and edit where you see fit.
Step 7: Auto-Publishing & Settings
Go to Content Settings.
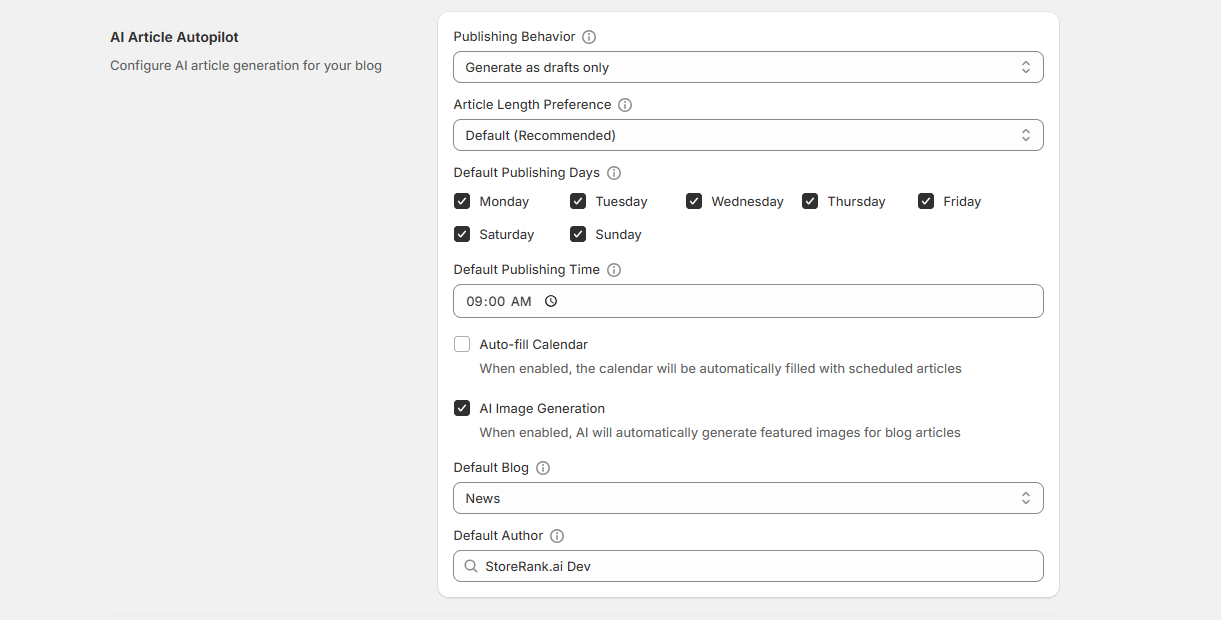
You can configure:
Publishing behavior (drafts only or auto-publish)
Article length preference
Default publishing days
Default publishing time
Auto-fill calendar (Pro+ plans)
AI image generation
Default blog
Default author
Brand tone & language
Auto-Publish Disabled
Articles are saved as drafts. You publish manually.
Auto-Publish Enabled
Articles publish automatically on the scheduled date.